Hot-Skin Part 2: Troubleshooting
Last month I published Part 1 of RV Hot-Skin testing. Here's Part 2 which takes a deep dive into hot-skin troubleshooting! Please proceed with caution since this can be dangerous….
Testing 1… 2… 3… (as easy as A, B, C)
Dear Readers,
Last month I published Part 1 of RV Hot-Skin Voltage testing, which you should review HERE. It does get a bit crazy from here on out, so it’s best that you totally understand the fundamentals before jumping into the deep water. Here’s my 3-part testing sequence that will quickly get you to the root of what’s allowing a hot-skin voltage to occur on your RV.
Step #1) Checking for a solid Equipment Grounding Conductor Bond
The ground wire must have a low-resistance connection to your RV chassis
For a hot-skin voltage to occur you have to have a break somewhere in the shore power ground wire path to the service panel’s bonding point (technically called the EGC for Equipment Grounding Conductor). Remember, a ground rod by itself DOES NOT ground your RV since its impedance is probably 25 to 100 ohms to earth. Grounding depends on your ground wire (EGC) connection in the RV, so that’s where we’ll begin the testing.
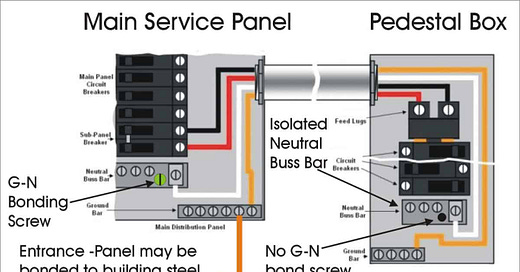
In short, the EGC needs to connect from the frame of your RV, through the shore power cord, into the pedestal receptacle, and all the way back to the main service panel’s Neutral/Ground bonding point, typically a green G-N Bonding Screw in the neutral bus to the metal box.
What should the EGC to Service Panel Bond resistance measure?
According to the NEC, this ground conductor path (the EGC for Equipment Grounding Conductor) needs to be able to carry sufficient fault current to quickly trip (clear) the main circuit breaker. That suggests the maximum impedance of the grounded chassis of your RV to the incoming service panel depends on the feeder breaker rated amperage and length/size of the current carrying conductors, but for a 30 or 50-amp shore power receptacle the bonding impedance should be less than 1 ohm, possibly as low as 0.5 ohms.
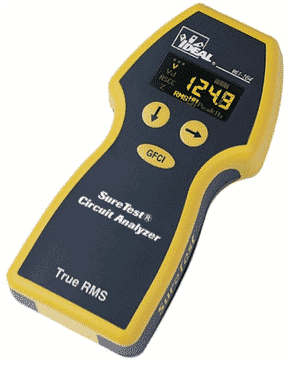
However, testing this grounding conductor impedance from the pedestal back to the power company is difficult (and likely dangerous) with a regular meter. However, if you have $300 to spend, this test only takes a few seconds with a Ground Loop Impedance Tester (GLIT) called a SureTest Analyzer. But that’s an advanced course for RV technicians, so I’m not going to cover its use today.
However, while there’s no simple, cheap and safe way to measure this ground conductor impedance back to the service panel while the power is on, we can certainly test our own trailer and any adapters to make sure there is continuity between the frame of the RV and the ground pin of your shore power cord and any adapters.
Safety first – Unplug from shore power!
Unplug your RV shore power cord from the pedestal but leave it connected to your RV, and set your meter to the lowest ohms scale. First touch the probes together and read the resistance number, which will likely be around 0.4 ohms or less. That’s the resistance of our probes, which we’ll say is zero on our meter.
If you had a fancy 4-wire Kelvin Bridge meter like I have for deep level troubleshooting, you could measure to a few milli-ohms. But for this type of test, 1/10th of an ohm accuracy is way more than sufficient.
With me so far? Now we’re ready for the main event. Next we’ll measure the resistance of the Ground/Neutral bond inside of your RV.
Start at the shore power ground pin
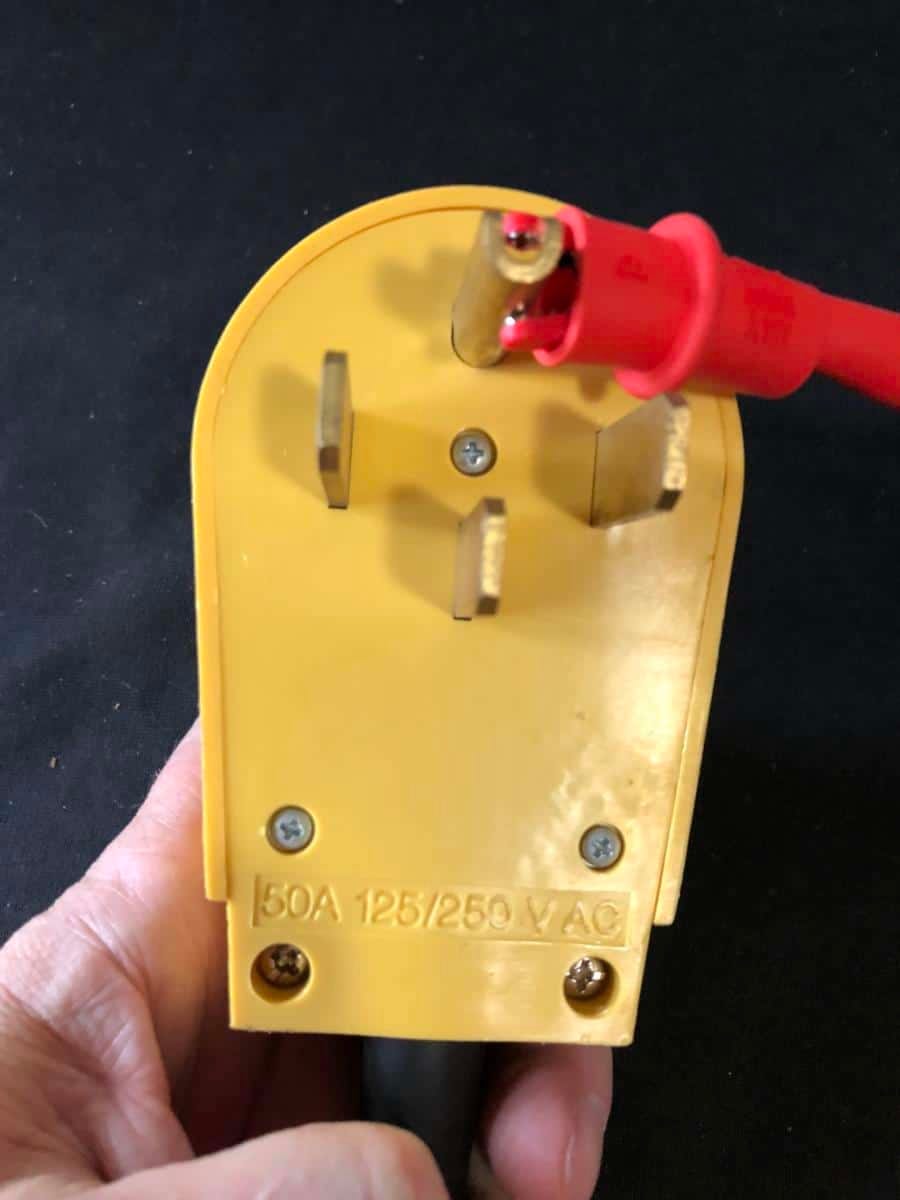
Now we’ll use the meter probes to measure the resistance between the ground pin of your shore power plug and bare metal on your RV. For a 30-amp shore power plug, the ground connection is the round pin at the top. It’s a U-shaped pin for a 50-amp shore power plug.
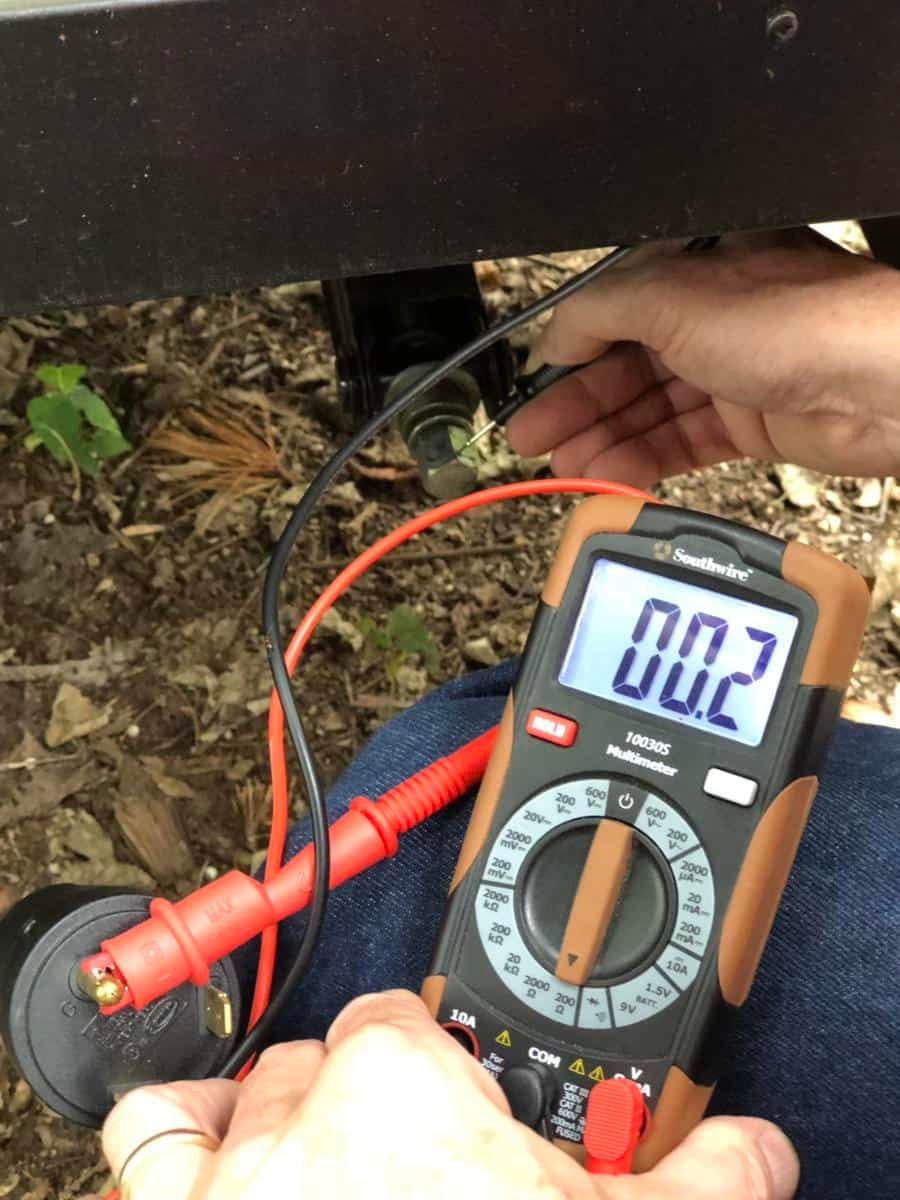
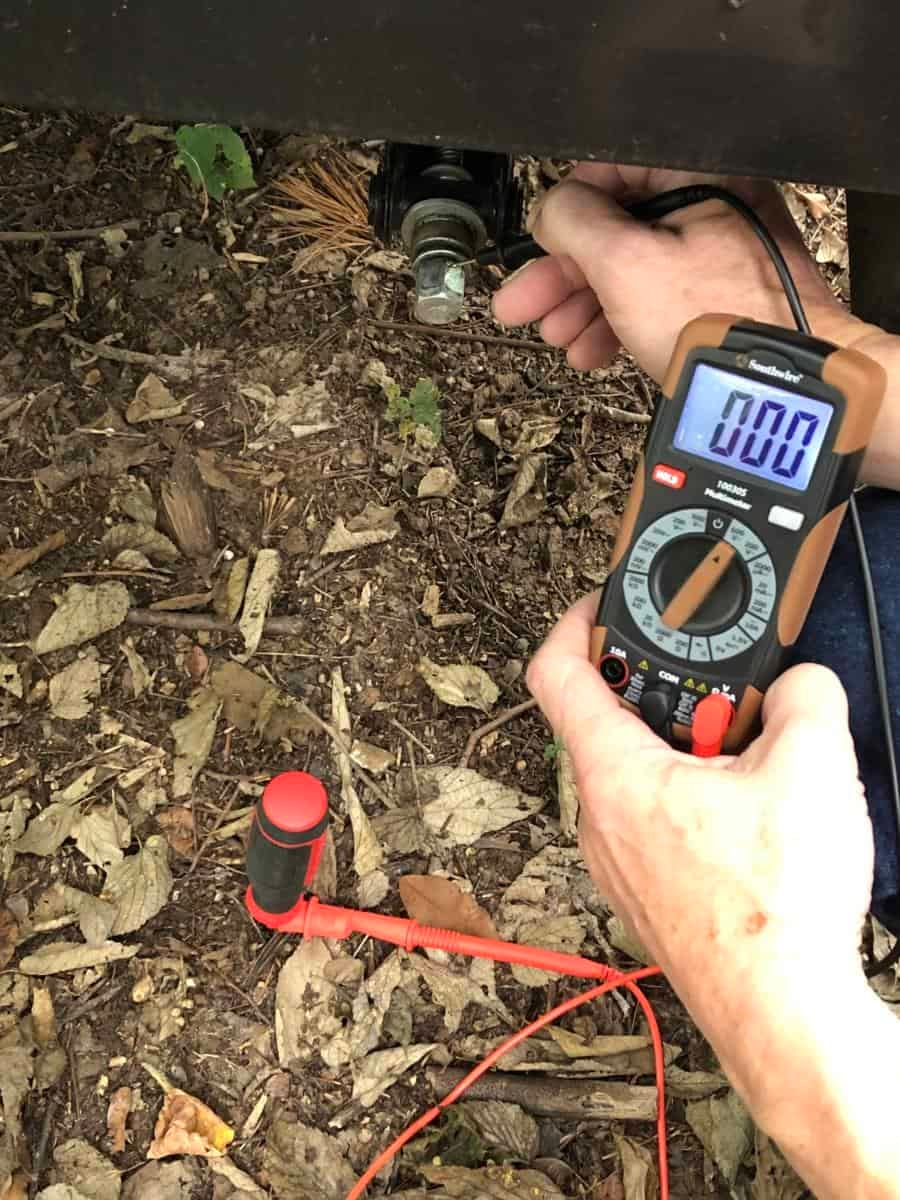
The leveling jack or metal steps are good candidates for the RV connection. This kind of test won’t work on a painted or rusty surface, so you’ll need to find clean metal bonded to your RV chassis, not some screw stuck in the fiberglass panel.
Check for EGC continuity to the chassis
The ground wire in your shore power cord (technically called the EGC for Equipment Grounding Conductor) is what carries away any leakage currents that could turn into a hot-skin voltage. It should measure very close to the same shorted-probe reading, possibly 0.4 ohms or less. In my case, I’m reading 0.2 ohms. That’s perfectly acceptable and tells us we have continuity in this most important connection.
If it reads dozens of ohms, hundreds of ohms, or even thousands of ohms (usually shows up as OL for Over-Limit) on the meter, then you have a break or high resistance connection in your EGC ground connection somewhere.
After you’ve confirmed the EGC to chassis continuity in this test, plug on any dog-bone adapter you might have to your RV plug and repeat the test. Once again, an extra 1/10th of an ohm resistance is OK, but any more than that indicates a corrupted EGC connection into your RV. That’s the likely reason why your fault currents are turning into hot-skin voltage. You need to correct the problem before you can go onto step #2.
Step #2) Test for an isolated Neutral and Ground in your RV
The RV’s ground and neutral conductors must be isolated from each other
That is, there should not be any neutral/ground bonding screw inside of your RV’s power panel. The same goes for the campground or home pedestal itself – no bonding screw. If there is this secondary bond in the pedestal or RV, then normal voltage drops in the neutral conductor would show up as a hot-skin voltage that’s 1/2 of the total voltage drop in the campground distribution system.
So, if the campground pedestal voltage sagged from 120 volts down to 104 volts, that’s a total voltage drop of 16 volts, and you could create an 8-volt hot-skin voltage between your RV chassis/skin and the earth.
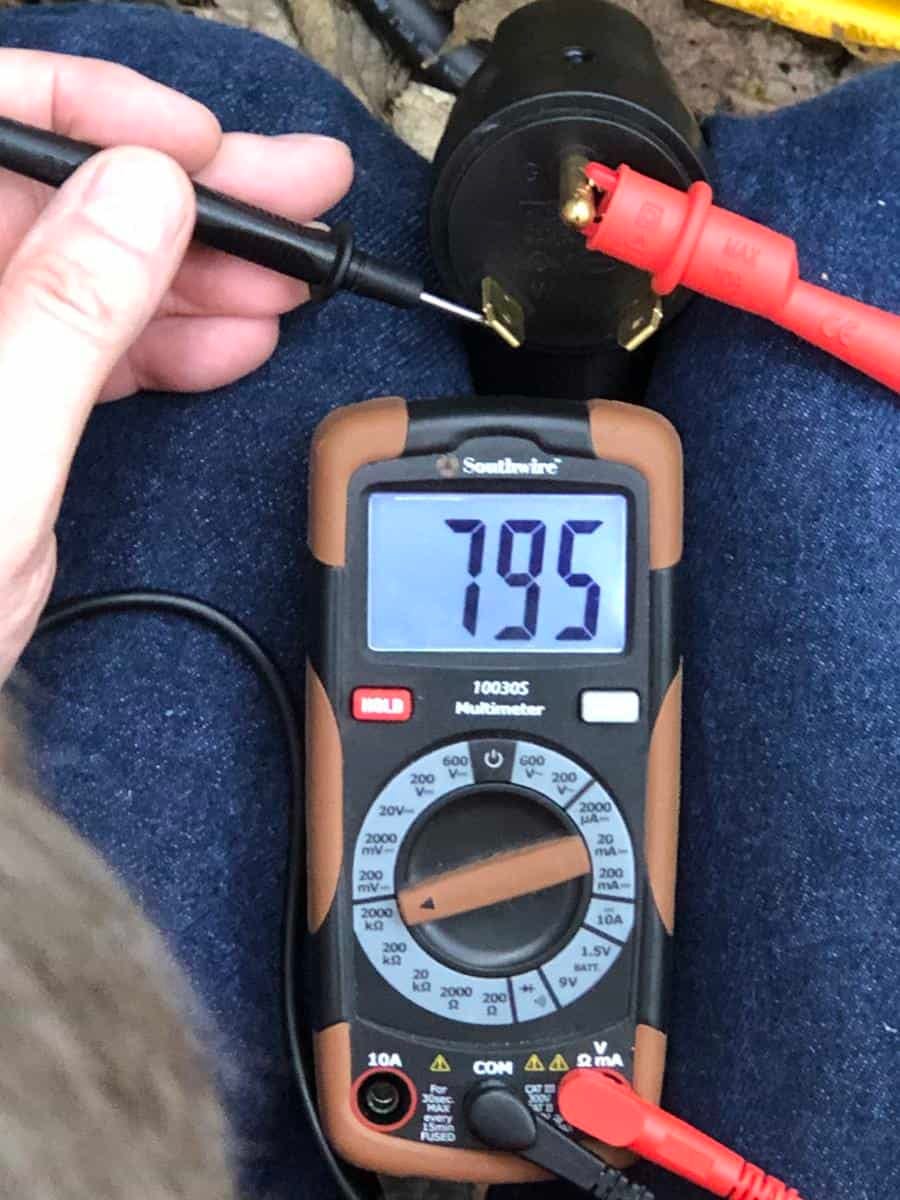
To test for this double-bond, unplug your shore power cord from the pedestal and leave it connected to the RV. Then setting your digital meter on the highest ohms scale, measure the resistance between the ground pin and the neutral blade on the plug. For a 30-amp male plug it’s a little tricky, so here’s a picture. For a 50-amp plug, it’s pretty obvious since it’s the blade directly below the grounding pin.
This should read nearly off the scale with hundreds of thousands of ohms resistance. Here you can see in this picture that it reads 795,000 Ohms (795 kOhms) from neutral to the ground pin, which is perfect.
If it reads a few thousand ohms or even a dead short of less than 1 ohm, then there’s a double-bonded neutral inside of your RV power center that must be corrected. You’ll want to get a licensed electrician to sort this one out since there could be hazardous voltages involved.
Step #3) Use a digital AC meter to measure for any voltage between your RV chassis and earth ground
Any voltage difference between your RV chassis and earth potential can be dangerous
Now you have to be very careful with this test, especially if you are already feeling a hot-skin voltage. First, you power up your RV like normal by plugging it into the pedestal or home outlet and turning on the circuit breakers. Next, plunge a screwdriver in the wet earth (use a jug of water if need be) and connect one meter lead to it. And finally, set the meter to 200 to 500 volts AC and measure the voltage between the metal shaft of the screwdriver and the bare metal contact on your RV, such as that same leveling jack.
However, be aware there’s the possibility that the chassis (and skin) of your RV could be energized up to a full 120 volts, with sufficient fault current to be dangerous. So don’t touch anything on the RV with your bare hand while kneeling on the ground. Treat it like it could be energized.
What’s the number?
The voltage difference between the chassis of your RV and earth ground should measure close to zero, but 1 or 2 volts AC is possible due to a power company 3-phase neutral imbalance. However, anything over 5 volts is a definite concern and should be diagnosed further. If you read 30 or 60 or possibly even 120 volts between the chassis of the RV and the earth ground, then you have a potentially deadly hot-skin voltage.
What does it all mean?
Since you’ve confirmed that your ground connections are correct in Step #1 and #2, there’s a high probability that any hot-skin voltage you have on the RV is due to a problem in the pedestal ground somewhere. Remember from Part 1 last week, if your EGC ground connection is compromised, then any leakage currents in your RV will have nowhere to go, so they’ll turn into a hot-skin voltage.
Unplug and get help
If it’s just 2 or 3 volts, that’s possibly normal voltage from the power company neutral or a campground double-bond in a pedestal, but anything over 30 volts can be deadly.
Again, DO NOT open up the campground pedestal yourself as it’s full of live wires and fraught with liability issues. Get the campground maintenance person to check the ground connections in the box and possibly replace the receptacle as that’s an obvious failure point. If they can’t fix it immediately, keep your RV unplugged from shore power until you can get it repaired. And NEVER leave an RV with a hot-skin voltage unattended. That’s just asking for trouble.
Down the rabbit hole
Since we’re this far down the rabbit hole already, I’m going to publish Part 3 on hot-skin voltage analysis in a few weeks. I’ll show you a few schematic diagrams of the fault current flow involved and how it can create a variety of hot-skin voltages and fault current levels. See you then…
Some fun, eh? Until next week, let’s play safe out there…. - Mike






I would agree, but I’m going to test this anyways. I have a 4-wire Kelvin Bridge ohmmeter which can test down to 0.001 ohms and self-calibrates to null out the lead resistance. I’ll take pictures.
Great info Mike. If you could create a PDF of all three parts people could download them and make printed copies if need be. I've always kept a information file on any vehicle I have owned. TSB's, shared tech info through groups like this one. Thanks