Troubleshooting: Divide and conquer
How to break down huge electrical problems into smaller pieces for troubleshooting…
How to divide huge electrical problems into smaller pieces
Back in the mid-’70s I had one of my first real jobs doing industrial power for a huge glass packaging plant. And no, I didn’t actually run the conduit and wiring – I supervised a team of electricians who did the physical labor that I drew out on blueprints.
So, of course, when anything went wrong I was expected to take an electrician or two with me to figure it out. And there was always a lot of time pressure because shutting down a packaging line meant dozens of workers doing nothing, with a loss of thousands of dollars per hour that the line was down.
The plant manager brought to my attention that there was a short circuit in the monitoring circuit somewhere in one of the dozen packaging lines and hundreds of machines in a hundred thousand square feet production area. That’s when the problem of fixing it was handed to me by the head of engineering.
So, here was the problem... In order to use traditional test methods of tracing the wiring for a short circuit with an ohm meter, I would have to shut down each of the 12 assembly lines for hours at a time, then look inside every single packaging machine for the short circuit. Plus there were hundreds (maybe thousands) of feet of overhead wiring and connections in the raceways, any of which could cause the short circuit. And that wiring was located 30 feet in the air and had to be accessed with a bucket on a lift. Plus there were hundreds of heavy pallets in the way that had to be moved by fork truck to access the overhead wires.
My job was to figure out a non-invasive troubleshooting method that could find the short circuit, hopefully in hours and not weeks, and preferably without shutting down the packaging lines at a cost of hundreds of thousands of dollars in lost productivity. Yikes!
Now, I was a young 24-year-old engineer with my first really huge troubleshooting challenge. But I already had 2 decades (20 years) in experimenting with electricity (since I started at 4 years old!), so I came up with a really simple plan. I couldn’t energize the control line with full fault current from the 20-amp circuit breaker because all it did was trip the breaker in a few seconds – which told me nothing about where the short circuit was located. And if I simply put a 10-amp load on it, there was no way to differentiate this current in wire from the hundreds of other control and power wire currents in the same raceway. No, I needed to create a special kind of on/off fault current signal that I could trace with an analog clamp meter. And here’s what I did.
Take a load off…
I used one of the 1,200-watt coffee makers we built and packed in this plant as my current limiting load, but I also wired up a pair of time delay relays so it would click on and off at a 1-second interval, like the tick-tock of a big clock. I could easily see the needle move up and down on my Triplett clamp ammeter at this frequency when it was clamped around the correct wire. No other wires in that raceway would have that 1 second tick-tock signal with 10 amps of current.
Now armed with nothing more than a coffee pot, a few time delay relays, and a 1970s Triplett analog clamp ammeter, my electrician Al and I took a fork truck with a bucket lift out to the center of the 12 packaging lines and opened up the lid on the raceway that was 30 feet in the air. Why did I start in the center and not one of the ends of the possible failure points? Well, I wanted to divide the entire production area in half.
Divide and Conquer….
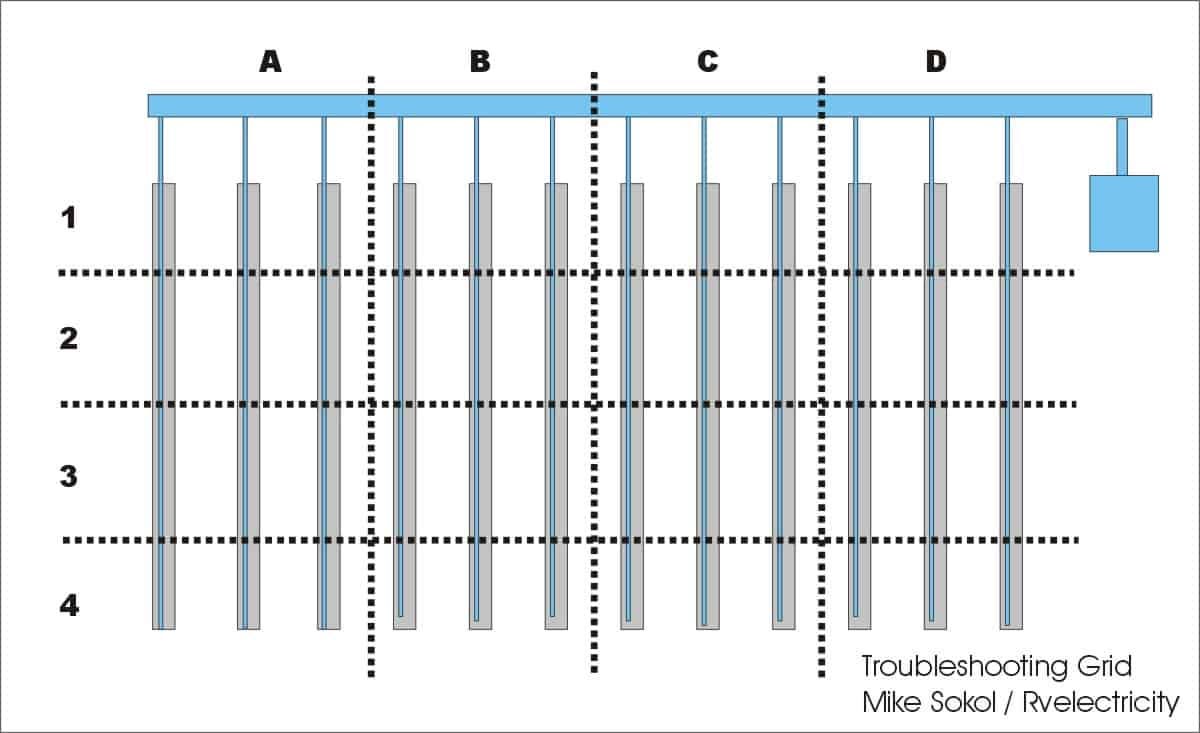
First, we drew a grid of all the assembly lines on graph paper, and started right in the middle of the main wiring raceway. You can see the gray lines that were the conveyor belts hundreds of feet long, with the blue wiring raceway that was 30 feet up in the air above each of the conveyor lines. And indeed, within a few minutes I had checked dozens of wires in one spot of the raceway and saw that the tick-tock fault current of 10-amps was heading further down.
So within 5 minutes of getting the fork truck into position we had determined that the shorting problem couldn’t be in 1/2 of the 100,000 square feet in the production area. We had thrown out 50,000 square feet of possible problems, just like that. We then divided the area by 1/2 again, narrowing it down to two separate 25,000 square foot ares, and drove the lift bucket down to between packaging lines 3 and 4. Once again we checked for the tick-tock pulses in the raceway 30 feet in the air, and within a few more minutes found which way the current was going into the the next section on my grid. Ta-da!
So far we had eliminated 75,000 square feet of possible problem areas and only spent an hour troubleshooting something my boss had predicted would take days or weeks, plus we never shut down a single packaging line for even a minute. However, the coffee pot clicked off since it was done making coffee, and we had had the foresight of putting in some fresh coffee grounds.
A well deserved coffee break…
So Al and I took a mid-morning coffee break and pondered what we had done so far. In less than two hours since we started, Al and I had eliminated 3/4 of the entire 100,000-square-foot area of the production line for the short circuit.
We continued this divide-and-conquer strategy a few more cycles until we isolated it to a single packaging line, which we then went to the middle and divided in half, then into quarters, then finally down to the single machine (out of hundreds of possibilities) where this 10-amp tick-tock fault current was going. We opened the panel and physically traced the wires, and found that one had been pinched between a washer and the metal cabinet by someone replacing a bad relay weeks before. A little nip-and-tuck with some diagonal cutters and a screwdriver, and all was well. We were done before lunch and called the production manager over to see the problem. He wasn’t even aware we were working on it since nothing had to be shut down.
Why current tracing can help fix your RV
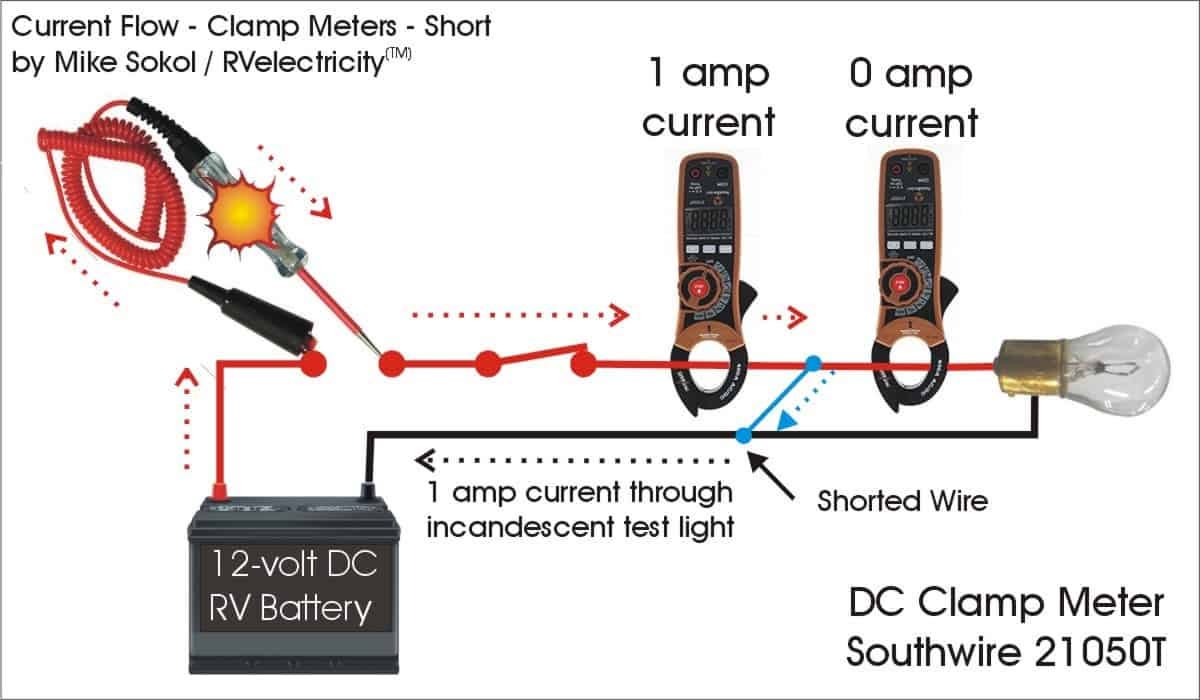
As I’ve been discussing in my latest articles on troubleshooting short circuits in large systems like an RV, you first need to create a fault current that won’t burn up the wires. Of course you can shut everything else off and look for a steady-state current draw of 1 amp or so. But if you have a big job where you can’t shut off the power, you just need to create some sort of current that you can see pulsing on and off with a clamp meter. And it could be nothing more complicated than a 12-volt bulb and time-delay relay.
After making a traceable fault current you just need to determine which way the current is going with your clamp meter, then divide the possible places on a grid into 1/2, 1/4, 1/8, 1/16 sections until your meter is right next to the problem area. You’ll find it’s usually something quite simple and visible like a pinched wire or a nail driven though a cable. But to avoid confusion, draw this up as a simple chart and write down the values you find at each junction.
The simplest answer is generally the correct one…
This same simplification logic process is at the heart of Ockham’s Razor, a logical process from the 14th century friar William of Ockham, where you throw away everything complicated that can’t possibly explain the problem (e.g., Green Martians did not eat your homework), and whatever answer you’re finally left with is most likely the correct one. To quote the big “O”: “Plurality should not be posited without necessity.” Or the KISS principle of “Keep It Simple Stupid.”
Happy troubleshooting, and let’s play safe out there…. Mike


Great advice! On a side note those Corning Coffee pots were all recalled. The glue used to connect the metal handle to the white glass part would decay over time and heat cycles. Eventually one would pick that thing up by the handle and get a nasty surprise when the bottom fell out and ... well hot liquid!
Great article and advice!