Time to check your anode rod…
Best to check and replace your water heater anode now rather than waiting until spring
Dear Mike,
I remember you writing something about putting water in your electric water heater before turning it on in the spring. But what about the anode rod? Any recommendations? —Dusty R.
Dear Dusty,
That’s a great and timely question. Hopefully you read my article last fall about being careful not to turn on power to your electric water heater before filling it up with water while de-winterizing it this spring. If not, please read all about it HERE.
What’s this anode thing?
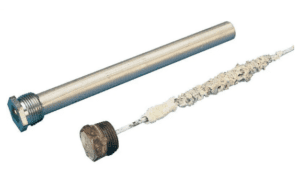
Well, it’s technically called a sacrificial anode because its job is to sacrifice itself to protect the metal parts of your RV (and home) electric water heater from corrosion. It’s a long metal rod made of aluminum or magnesium that extends into the interior of the tank.
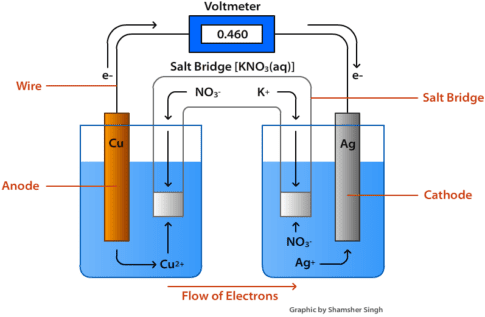
This is needed because any two dissimilar metals in an electrolyte (even potable water) will act like a battery. And that small DC current is enough to start forming ions and leaching them away from your important metallic bits inside of your water heater. Without an anode your electrical water heater tank would fall apart in a few years.
What is the job of the anode?
It “takes one for the team,” as it were. As you can see in the diagram, there’s an anode (the sacrificial one) and the cathode (all the other metal parts. The anode provides the source of ions rather than your metal tank. This diverts the corrosion effect away from your metal tank parts, and corrodes itself.
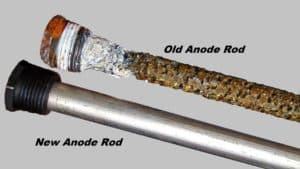
After several years (depending on how much it’s used) this sacrificial “anode” actually sacrifices itself and turns into a shadow of its former self.
How will I know it’s time to be replaced?
You’ll know it when you see it, since most of the anode will be eaten away. But most manufacturers recommend checking and replacing one every three years.
However, they’re cheap enough that if you take it apart this spring, I would simply replace it even if the element isn’t too corroded. “An ounce of prevention is worth a pound of cure.” Here’s one that my son just pulled out of his residential water heater. Looks like a swarm of angry termites chomped on it…
Can I replace one myself?
If you’re reasonably handy, it’s a pretty straightforward DIY Project.
The anode a great thing to check prior to de-winterizing your RV prior to your first spring trip. First, make sure you get the appropriate anode for your exact water heater. There’s only a few types of RV anodes available, but make sure you have exactly what you need in hand before you start tearing things apart.
The best place to start is to search on the brand and model of your RV water heater. Most of these cost around $10, so get one now for a rainy day. You’ll thank me later…
What about tools?
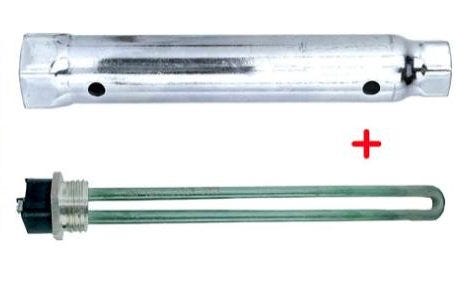
Next, make sure you have the right tools. The same multi-tool socket that I recommended for changing your water heater’s electric element will usually work on the anode as well, but check to be sure.
So, go ahead and start gathering your tools right now. Don’t wait until the Friday before your Saturday camping trip to start on it. That’s just asking for trouble…
Don’t over-torque it!
Remember, the replacement anode should have a gasket or use teflon tape, and it will have a recommended tightening torque. Don’t overdo it, lest you break something expensive. And be sure to fill up with water and check for leaks BEFORE you pull out for your first trip. A leak is easy to fix in your driveway, but not so easy while camped far away from civilization.
OK, everyone. Remember that electricity is a useful and powerful force, so we all need to pay attention to safety precautions while using it.
Let’s play safe out there…. Mike


ONLY applies to Suburban Water Heaters. Atwoood/Dometic water heater are not steel tanks and do NOT have anode rods. These should only be fitting with a plastic drain plug.
Safety Tip: Make sure you pull the lever on the blow off valve before you remove the Anode. Unscrewing a plug with 40 some PSI behind it will not end well.