RVe Part 3: Measuring Pedestals
How to measure a campground pedestal for proper voltages
Last week we learned how to read a basic Digital Volt Meter and test a 15- or 20-amp standard outlet such as you might find in your living room or RV interior. Now it’s time to move up the ladder to testing 30- and 50-amp campsite outlets. Again, you’ll be handling live voltage so take all safety precautions.
Only use one hand to touch the meter probes or campsite pedestal. Electricians are taught to put their other hand in their back pocket so they don’t lean on anything.
Don’t stand on wet ground while testing outlets. If the ground is perfectly dry you should be safe wearing dry sneakers. If not, then put a dry rubber shower mat down on the ground to stand on while checking voltages.
Always make sure to turn off the circuit breakers on the power pedestal before plugging or unplugging your RV from campsite power.
Safety or even standard prescription glasses are highly recommended. These don’t have to be anything fancy, but if something goes wrong you’ll be glad you were wearing glasses. I owe my eyesight to the fact I was wearing glasses when an electrical panel shorted out right in front of my face. It’s cheap insurance.
Bigger Outlets
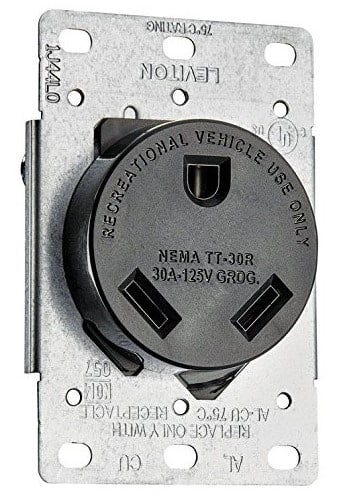
Today’s RVs have much greater power requirements than those of even 10 years ago. You’ve got lots of appliances, so that single 20-amp outlet can’t provide enough current. This is when you need to step up to 30-amp outlets at the campsite. Let’s see how they’re wired.
Here’s a side-by-side comparison of both a “home-style” 15- or 20-amp outlet on the left and a special “RV” 30 amp outlet on the right. Next week we’ll get into how the amperage rating affects the number of appliances you can run, but for now we’re just measuring voltages.
The first thing you need to note is the orientation of the ground lug on both sockets. Last week we used a 20-amp outlet for an example with its U-shaped ground lug at the bottom, while in this picture the ground lug is at the top. That was not a mistake, as most home outlets are wired with the ground at the bottom, and most electrical panels are wired to more recent code with the ground at the top. It doesn’t really matter which way the socket is wired as long as you keep your own head right-side-up. So if you’re looking at an upside-down outlet, turn the illustration upside down to match the outlet.
While most casual RVers will recognize the little U-shaped hole as the ground, it’s the other two slots that get confusing. As we learned last week in Part II, on a 15- or 20-amp outlet, the taller slot is always the Neutral wire, and the shorter slot is always the Hot wire.
Here’s a little more info: if you peek inside an electrical panel or extension cord plug, the ground wire is always GREEN; the Neutral wire is always WHITE; and the Hot wire is always BLACK. This holds true for both the pedestal outlets as well as any extension cord you may have.
However, on a 30-amp outlet, there’s no difference in size between the Hot and Neutral slots when viewed from the outside. So here’s where you just have to remember this fact or print this page out. Think: While looking at the front of the outlet, if the ground is at the top, then the “white” is on the “right.” That’s how I remember it. If you’re looking at the back of the receptacle you’ll see two different colored screws, and the white wire goes under the white screw while the black wire goes under the brass screw — but we’re getting ahead of ourselves as that’s a future article on testing extension cables.
Settings
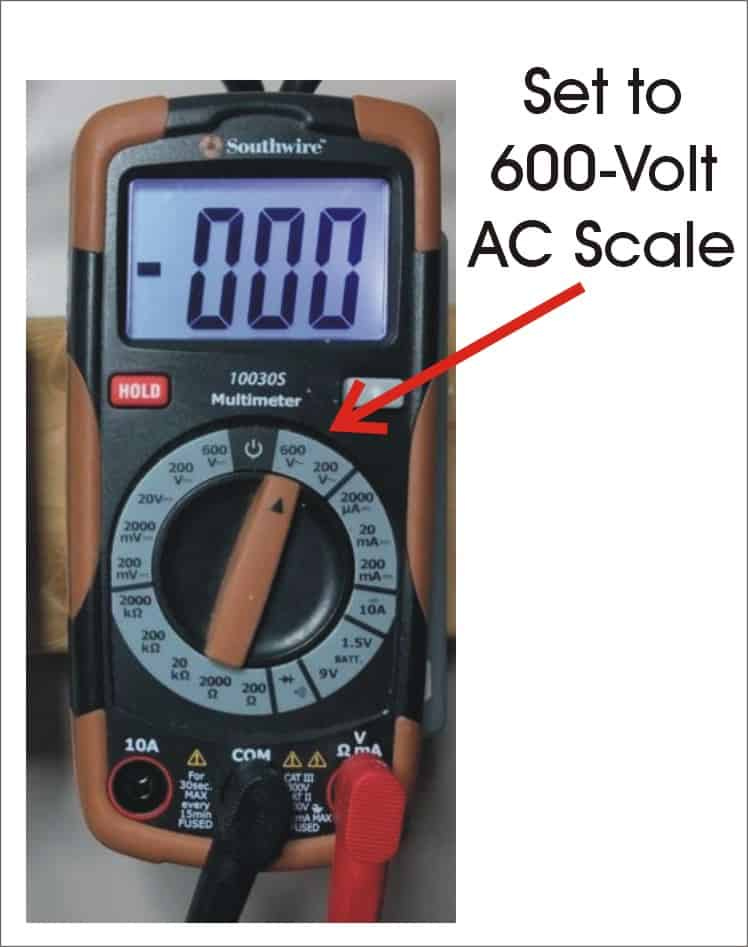
Remember to set your voltmeter to an AC Voltage scale more than 250 volts, typically 600 or 750 V AC. Plug your meter leads into the Black COM and Red VOLTS connections on the meter, and get ready to poke the meter probes into the receptacle. Now turn on the circuit breaker in the campsite pedestal and push in the reset button on the GFCI if it’s popped out.
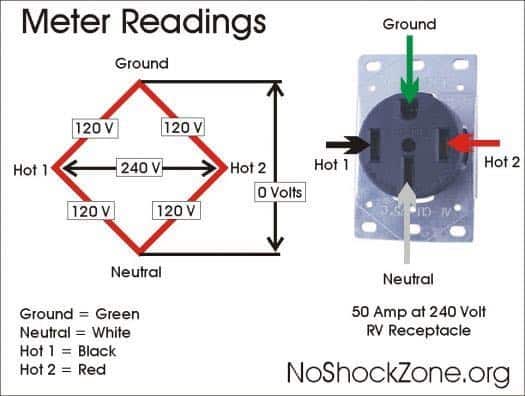
You can see from the red triangle diagram in the middle of the illustration that from Ground to Neutral you should measure close to 0 (zero) volts. From Hot to Neutral you should measure around 120 volts, and from Ground to Hot you should also measure around 120 volts. Probe between each two slots and note whether the voltages are correct. Be especially careful that the Neutral to Ground reads 0 (zero) volts and the Hot to Ground reads around 120 volts. If not, then the polarity of the plug is reversed and your RV could exhibit a Hot-Skin condition or trip an internal circuit breaker when you plug it in, depending on how it’s wired.
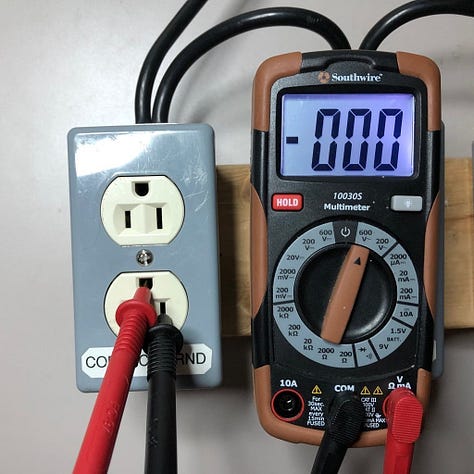
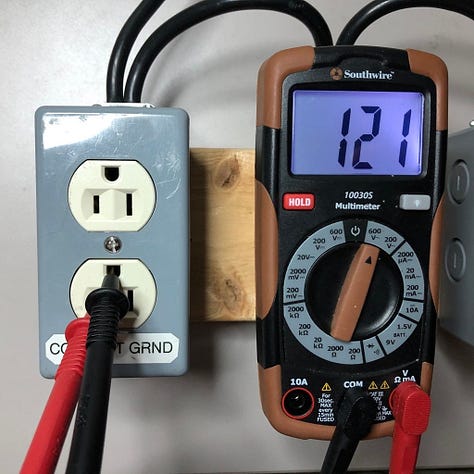
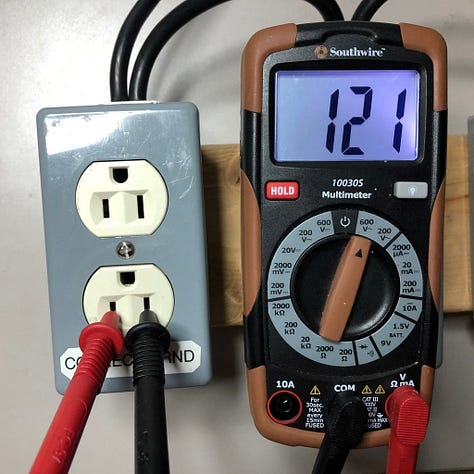
You can accept as low as 108 volts and as high as 132 volts on a 120-volt feed using the 10% plus or minus rule, but realize there will be additional voltage drops at the pedestal outlet when you draw any amperage, and you’ll also have a few volts loss in your extension cord(s). So it’s better to start with at least 115 volts on an unloaded pedestal since it really needs to stay above 105 volts in your RV to guarantee that none of your electronic appliances suffer from brown-out problems. (See part VI of this series about voltage drops). Plus a green ground wire could have up to 2 or 3 volts between itself and neutral, but anything more voltage on the ground wire means the outlet is wired incorrectly so DO NOT PLUG IN YOUR RV. Notify the campsite manager immediately and get this checked out by an electrician. Do not open the pedestal box yourself and poke around inside.
What’s This 240-Volt Thing?
Perhaps the most confusing part of hooking up an RV is that some plugs are 120 volts while others that look similar are 240 volts. Just how do they manage to get two different voltages out of the same wires? Glad you asked.
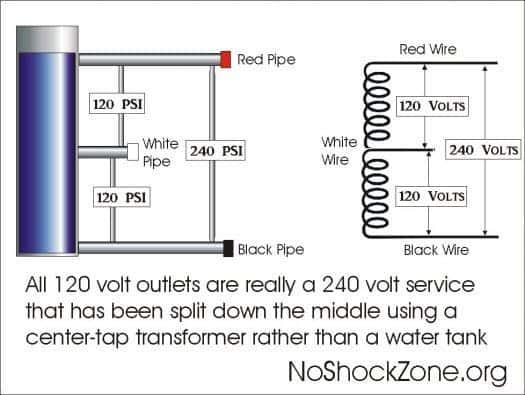
If you remember our water tank example from Part I: the taller the tank, the greater the pressure. And since voltage is really electrical pressure, the same idea holds true. Look at the tank on the left and imagine you’ve got a pressure gauge that reads the difference between two pipes. So if you read between the red pipe at the top and the black pipe at the bottom, your gauge (or meter) will indicate the full pressure, which is in this case 240 PSI (Pounds per Square Inch). However, if you hook up the gauge (or meter) from a center pipe to ether the top or bottom pipe, it will indicate exactly half the pressure, which in this case is 120 PSI. The exact same thing happens at the power transformer on the pole feeding into your house or RV site. You really have 240 volts available, but there’s a center tapped transformer rather than a pipe. So if you connect a meter (or appliance) between the Red and Black wires, it will receive the full electrical pressure, which is 240 volts. But pick only the Black or Red “hot” wire and hook the other side of your meter or appliance to the center-tap White “neutral” wire, and you’ll have exactly half of the full voltage, which will be 120 volts.
50-Amp Outlets
So if your RV has a 50-amp, 120/240-volt plug for its power connection, you really have to understand what you’re hooking into and testing is critical.
Take a look at the illustration above. You’ll see a standard 120/240-volt, 50-amp receptacle as found in many campgrounds. Look at the illustration on the left and you’ll see that the slots are placed like a little baseball diamond. If it’s oriented according to code with the U-shaped ground at the top, then follow along. If you plug your meter probes from Home plate (Neutral) to 1st base (Hot 2) you should read around 120 volts. From 1st base to 2nd base (Ground) you should also read about 120 volts. From second to third base (Hot 1) should read approximately 120 volts, and finally from 3rd base back to home you should read approximately 120 volts. Now, from home plate to 2nd base you should read close to zero (0 to 2) volts, and from 1st base to 3rd base you should read between 220 and 250 volts.
So as you move your meter probes around the bases, every slot to the next slot should read about 120 volts. As you read sideways across from the left side (Hot 1) to the right side (Hot 2) you should read between 220 and 250 volts. And, as you measure from top (Ground) to bottom (Neutral), you should read close to zero (0 to 3) volts.
If your meter reads anything else, STOP IMMEDIATELY, shut off the circuit breaker and notify the campground electrician. Do not plug in your RV or any other gear as it could be damaged or you could be electrocuted
Thanks for the Memories
Here’s a quick diagram of how all pedestal outlets should be wired and the basic measurements.
As always, if you think there’s an electrical problem with your RV or campsite outlet, don’t try to fix it yourself. Get a licensed electrician to make the repair. And, if you ever feel a shock from your RV, immediately get away from it and shut off the circuit breaker in the campsite pedestal. Then notify the campsite electrician and refuse to hook up power until the problem is resolved.
Let’s play safe out there…. Mike




Thanks Joseph. Why do I have trouble making sufficient contact (at times) with the probes. I know you are suppose to do this one handed. But I’ve been in campgrounds where I have to continuously f’fish’ with the probes to get a reading. Am I doing something wrong?
Mike, I constantly struggle to make contact with my leads. I have to move them around and can’t seem (at times) to get a reading--thus the continuing move the leads around. Are mine to short or am I doing something wrong?