RVe Part 11: Extension Cord Testing
An extension cord can be your RV’s lifeline, so you better treat it with respect
Dear Readers,
As promised, here’s Part 11 of my original No~Shock~Zone series on RV electricity. This covers extension cord selection, maintenance and testing.
Extension Cord Testing
Copyright Mike Sokol 2010/2020 – All Rights Reserved
The lowly extension cord
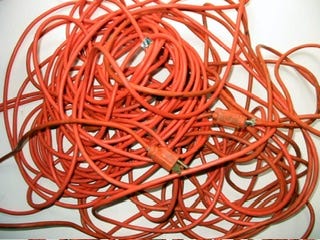
Few objects in an RV get less respect than the lowly extension cord. They’re kicked around, stepped on, run over, and dragged through the mud. And most of the time they don’t even get wrapped up neatly. No, they’re often thrown unceremoniously into a tangled heap, then plugged in and expected to pass more current than they were ever rated for.
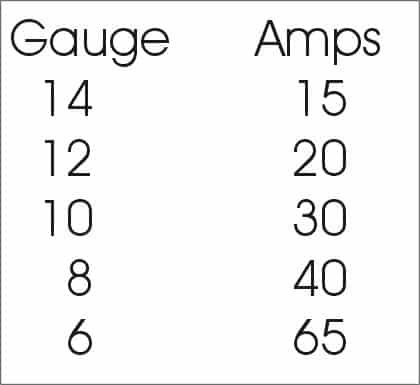
If you don’t know how much current your extension cord can safely pass without overheating and catching on fire, please reread RV Electrical Safety: Part V – Amperage.
That being said, please check that your extension cords are heavy enough to supply the amperage needed by your RV before proceeding with any testing or repairs. [Editor: On Dec. 31, Portland, Oregon, firefighters responded to a travel trailer fire started by a “low-grade extension cord” that had been wrapped around something. The trailer’s occupant, an older person, was sent to the hospital with burns and inhalation injuries, said to be life-threatening.]
The ends
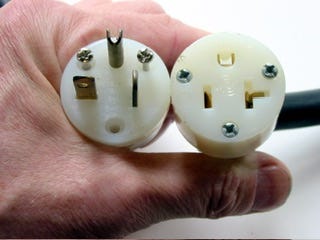
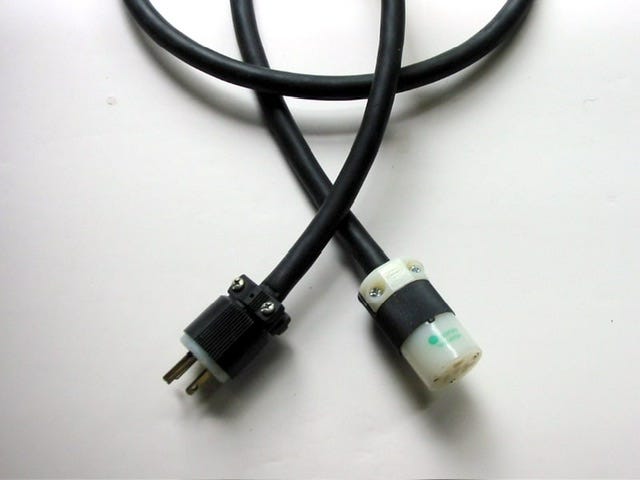
Here’s what the ends of a typical 20-amp extension cord looks like. Notice there’s a male plug on the left side of the picture, and a female plug on the right side. Most everyone should already know that the female plug is the power “output” while the male plug is the “input.” That is, the bare metal pins of the male plug on the left should never be electrically energized while it’s out in the open, but the female plug can be electrically “hot” at any time.
Also note the orientation of the plugs. While holding them both facing you, the sideways “neutral” blades are reversed on the left and right side of the picture. That is, the male plug has its neutral blade on the left, while the female plug has its neutral blade on the right. That’s because they’re designed to be rotated 90 degrees to mate when making a connection, in which case the neutral, hot, and ground blades will match up. This single idea is what gets lots of RVers in trouble when putting a new plug on an extension cord.
Exploratory surgery
If you’re not comfortable looking inside an extension cord plug, then please find someone with an electrical background before proceeding. And please make sure that both ends are unplugged from power before taking anything apart. Even 120 volts can be deadly, so be careful.
White is neutral
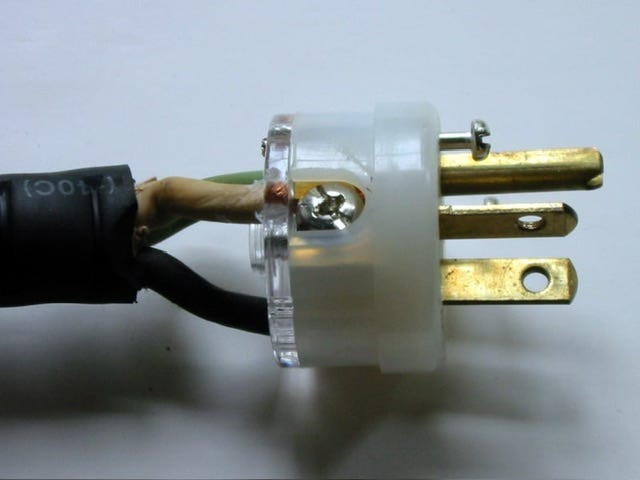
In previous No~Shock~Zone articles you’ve read about different color wires and screws, so here’s a close picture of what it looks like. Note that the extension cord wire itself has a white-colored insulation which is stripped back to let the bare copper go under the white-colored screw. That’s the neutral connection we’re always talking about.
Green is ground
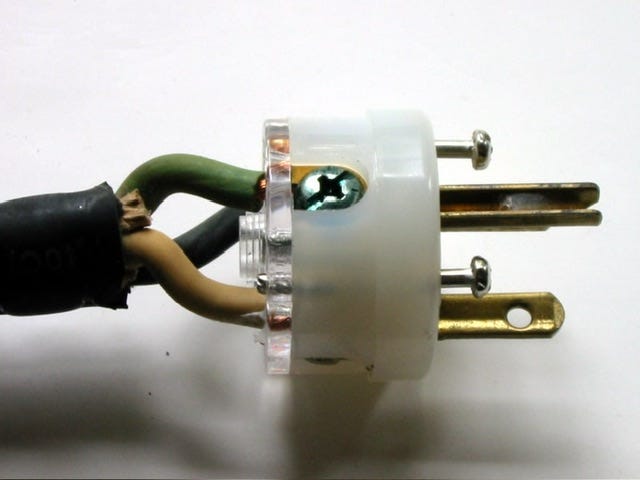
And here’s what the green ground wire looks like properly placed under the green screw. Note that in extension cords that wire will actually have a green insulation layer as shown, but installed Romex wiring within your home or RV electrical panels will have a completely bare copper wire that’s the ground connection.
Black is hot
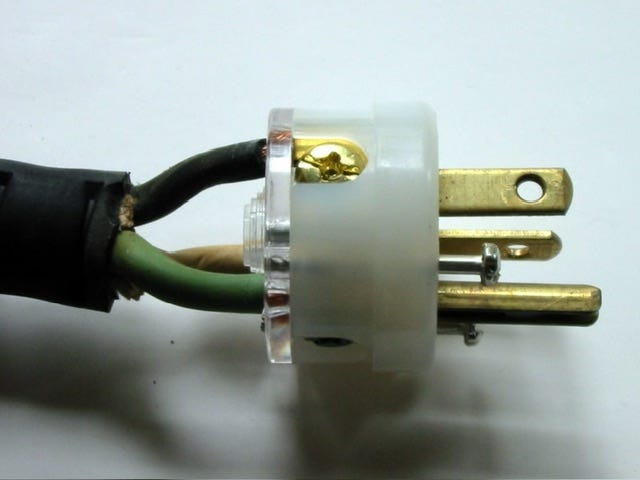
Finally, here’s the black “hot” wire under the brass colored screw. If you’ve read any of the previous RVelectricity articles you’ll know how important it is to follow this color code. Anything different is not only illegal, but can cause a dangerous Hot-Skin condition on your RV.
Measurements
If you don’t remember how to use a Digital meter, please go back and reread Digital Meters - Just the Basics.
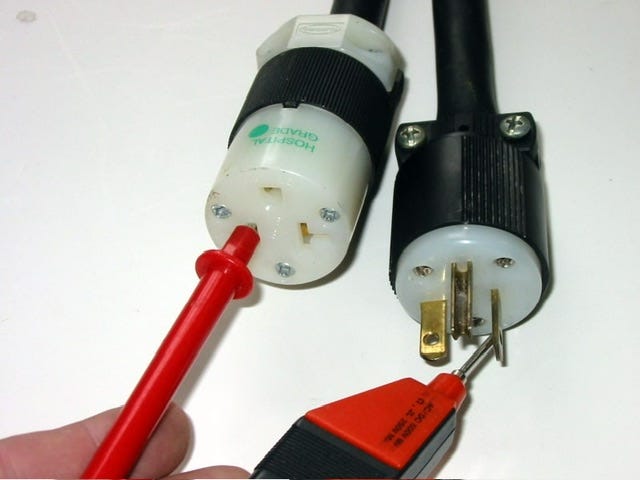
Note that this is the only time you’ll set the meter to read “ohms” or “continuity.” And you must be certain there is no AC voltage on the plugs before inserting the meter leads or you’ll “blow” your meter. In this case I’ve set my Triplett pocket meter to “continuity test” which will “beep” when the meter leads are touched together. That indicates a complete circuit, which is what we’re looking for in this test.
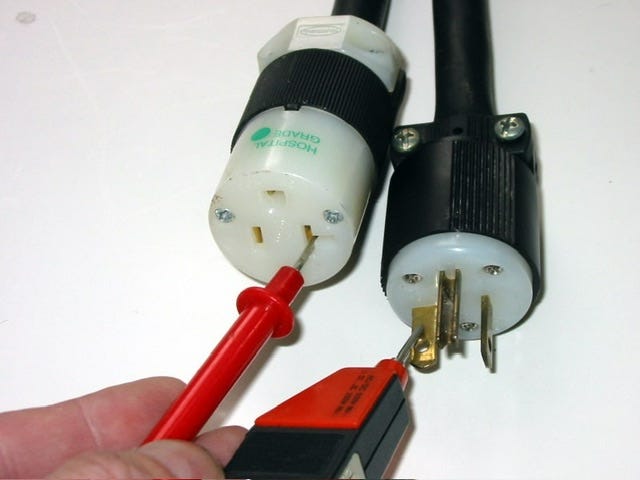
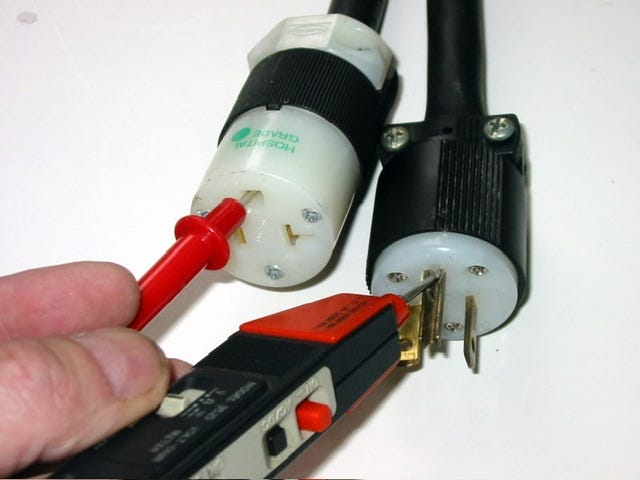
Hot test
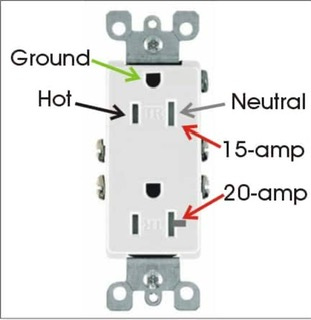
Notice that when both plugs are facing you, the neutral and hot blades will be on the opposite sides of the plugs. For example, the female plug has the hot blade on the left side, while the male plug has the hot blade on the right side. Again, that’s because when the plugs are rotated 90 degrees to plug into each other, the hot, neutral and ground blades need to line up. You should hear your meter “beep” when touching both hot blades at the same time as shown above, but for no other combination of connections.
Neutral test
The same idea holds for the neutral blades. Notice that for a 20-amp plug the neutral blade is turned sideways. If you see a plug with both neutral and hot in the same direction (parallel) then that plug is only rated for 15 amps of current. Again, your meter should “beep” when touching both neutral blades at the same time, but for no other combination.
Ground test
Finally, check for continuity of the ground blade. It’s always the little U-shaped slot or blade and typically has a green colored screw on the back, so the usage is pretty obvious. Green is always ground (in the USA, at least).
Color code
You’ll want to double-check the wire colors of the connections in any repaired extension cord. That’s because something as simple as reversing the black (hot) and green (ground) wires in an extension cord will certainly electrify the skin of your entire RV. There are electrical safety systems from Progressive Industries and others that will shut off the power coming into it if wired incorrectly. But be aware that unless they’re hard-wired into your RV’s electrical system, it would still be possible to defeat their safety function if you then used an improperly wired extension cord from their output into your RV.
Don’t accept shocks!
Also, always be aware of any tiny “tingles” you may feel when stepping into your RV from the wet ground. There should be essentially zero volts from the earth to the frame of your RV at all times. Anything more than a volt or two means that something has been wired improperly, either at the campsite pedestal or perhaps inside your extension cord. So don’t proceed if you feel a shock of any kind. Shut down the pedestal breaker and get the campsite electrician to determine what’s wrong with the hookup that’s causing a shock. The life you save might be your own.
Wrap up
There are a number of extension cord wrapping gadgets available, any of which is better than letting your wires become a tangled mess. I think they’re a good investment. Also, remember to visually check for any kinks or slits in the outer insulation of your extension cord, and certainly any exposed copper wire is a big no-no.
Also, if you notice that the brass-colored blades on the plugs are discolored or the plastic is brown due to overheating, it’s time to replace the cord, or at least replace the plugs. Once a female plug overheats, the tension of the internal contacts is lost, which causes more heating that leads to more lost spring tension, which eventually leads to a brown-out (low-voltage condition) or even a fire. So take care of your extension cords, and they’ll take care of you.
You get what you pay for
In the end, paying a little more money for a quality product is the best way to go. The orange molded extension cords you get from the big box stores are usually not heavy enough for rugged RV usage and they tend to get hot and catch on fire when pulling any sustained amperage (ask me how I know that). So heavier and shorter is better when it comes to selecting an extension cord to power your RV.
Contact maintenance
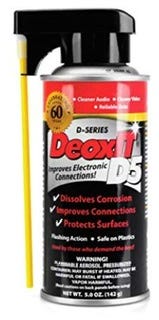
In addition to visually inspecting the contacts for signs of pitting or being damaged from bending, you should also clean them at least once a season with a quality contact cleaner. My favorite is DeoxIT D5, which is available in a small spray can that should last you for a few seasons. Yes, it’s a bit expensive but you only need a spritz to clean and lubricate the contacts, and it’s the best thing you can do for any of your power connections, including your shore power cords.
Future shock
Part 12 of this series will cover what to do if you find someone who’s been shocked and knocked out. So come back next time for a basic lesson in compression only CPR. See you then.
Let’s play safe out there…. Mike




Mike, nice photos of a homemade extension cord. I usually make my own using SO cord of 14 or 12 wire. If people do decide to replace ends or build their own they should recognize that if they need to twist the wires to get to the appropriate colored screw they are putting the plug on the wrong end. The wires should always go straight in to their respective screw without twisting them.
I very seldom buy any cord smaller than 12ga. 10ga. if 100'. I try to buy shorter cords, for less resistance, coupling as needed. Is the presence of any resistance in connectors (Given they are properly maintained) defeating my "Short cord" theory?